Macro and close-up digital photography opens up new possibilities for your digital images. Wherever you see landscapes and portraits, you can now turn your camera into a tiny bug crawling on the ground or a mole on the subject's neck. You get intimate images that show the world anew. But you need to overcome new challenges to make this happen.
Macro photography and macro photography equipment
To achieve macro and macrophotographic results, you need to focus on subjects at a closer distance. To get closer to your subjects, you will need specialized macro and large-scale equipment and techniques. Here are some of the ways macro and close-up photographers get the shots they want:
Use a fixed lens with macro photography. Unlike regular lenses, macro lenses allow you to shoot very close to your subject while maintaining sharp focus. Most macro lenses zoom in on you to capture a 1:1 magnification ratio. This means your subject appears life-size on your camera's digital sensor.
Use an extension tube to complement your lens. Extension tubes are hollow accessories that connect between the camera body and the lens. They provide space between the lens and the sensor, allowing you to focus closer than usual. The relationship between extension tube size and lens focal length determines how close you can get. A 50mm extension tube paired with a 50mm lens provides a maximum ratio of 1:1, however a 50mm extension tube paired with a 100mm lens provides a maximum ratio of 1:2.
Attach teleconverter to the lens to increase magnification. Teleconverters are optical devices that connect between the camera and the lens. They magnify the image produced by your lens to make it larger on your camera's digital sensor. When using a teleconverter, the image is magnified, but you don't have to get closer to the subject. This makes teleconverters ideal for photographing subjects that are easily startled or in hard-to-reach places.
Rotate the lens to increase your ability to focus close to your subjects. By detaching the lens and rotating it (so your camera is viewing from the front element and from the rear element), you can get closer to your subject and achieve greater magnification. Try this method by simply holding the lens in front of the camera. If you are happy with the results, consider purchasing a ring shifts (an accessory that allows you to correct the lens facing the camera body) to hold the lens in place.
Lighting Macro and Macro Subjects
Close-up and close-up photography usually requires you to be very close to your subjects. This can be problematic when it comes to light, as your camera lens (or your head) can cast a shadow on the scene or subject. The closer you are to the subject, the more likely you are to block light.
When working with natural light, choose scenarios in which the subject is lit from the side, there is an ambient type of light, or the subject is backlit. A front lit situation forces you to be between the subject and the light.
When your scene doesn't provide the ideal lighting situation for your shot, you can take matters into your own hands:
Use a reflector to bounce light into your scene. This will help you control the direction of the light and ensure that your subject is not in shadow. You can use any surface that reflects light, such as a mirror, a white piece of foam core, or a shiny metal surface.
Keep a small battery-powered flash in your camera bag. Flash allows you to illuminate objects in any direction. Just make sure you have the proper setup to fire the flash from the camera, as on-camera flash is somewhat useless in close-up and close-up situations.
Attach a macro lens signal to the lens. A ring of light surrounds the edge of the lens, providing smooth, consistent light in close-up scenes. This allows you to light your subject from the front without having to worry about casting your shadow on it.
Controlling depth of field for close-up and close-up photography
High magnification levels mean that your depth of field naturally becomes shallower than normal. This can be good when you really want to highlight your subject, but if you want more depth of field, you'll need to adjust.
If you want to use a shallow depth of field to create a composition with selective focus(only one spot in the image appears in sharp focus), you can use a large aperture setting (e.g. f/2.8). Your focus needs to be precise in this situation so it appears exactly where you want it. Use a tripod to stabilize the camera; this will ensure that your focus point doesn't move once you set it. A rail guide(a device that allows you to move your camera with precision towards and away from your subject) can help you control your focus point.
If you want to increase your depth of field, you'll need a small aperture (like f/22). This type of aperture allows in a small amount of light and requires you to use slower shutter speeds to properly display your scene. A tripod helps hold the camera up during exposure, eliminating motion blur that causes camera shake.
Improving macros and close-up photography in post-production
All is not lost if you don't get the perfect shot. Software Postproduction photo editing software allows you to improve macro photography and close-up photography of digital images, as well as correct minor errors that occur during shooting. By learning how to use this type of program, you can make your photos pop and achieve technical excellence.
Sharpening The post-production image helps create sharper edges and can be used to enhance an already sharp image or to correct an image that was taken slightly out of focus. (This tool is not a miracle worker, so remember that it's always better to shoot an image with sharp focus rather than relying on aftermarket sharpness.) Be careful not to sharpen the image, which causes haloing to appear around your edges—a sure sign to viewers that you used the sharpening tool.
Adjust exposure by enlarging or darkening the image in post-production. You can make minor adjustments or correct errors. But like most post-production techniques, adjusting exposure too much can cause a significant loss in image quality and may appear obvious to viewers. You can use curve adjustments to adjust exposure in certain areas without affecting others. For example, if your highlights look great but your shadows look too dark, raise the curve's shadow area while keeping the highlight area as is. Do this to lighten your shadows without affecting your highlights.
Touch up imperfections to eliminate distractions. When your focus is very close to the lens (particularly if you're using a small aperture for a large depth of field), lens dust will often show up clearly in your photo. Any dust, scratches, unwanted hot spots or shadows can distract the viewer's eye from your subject or make the image appear dirty. Most photo editing programs offer a variety of tools that allow you to define, clone, or retouch an image. Use these tools to eliminate shortcomings and distractions to keep viewers engaged with your topic.
by Arief Perdana
Macro photography of wildlife is not as easy as it might initially seem. Besides the technicalities of getting clear close-up shots, photographers are constantly faced with the fact that insects have a nasty habit of running away as soon as you approach them.
But don't let some little bugs get you down and stop you from learning to enjoy photography.

by Harm Oosterhuis
Canon EOS 60D camera
Focal length 100 mm
Shutter speed 1/200s
Aperture f/4.5
ISO 320
It is almost impossible to imagine a macro photographer without a flash. IN bad weather it will provide the necessary amount of light, and in sunny weather it will remove contrasting shadows from the sun. Naturally, for macro objects it is desirable to have a ring LED illuminator. But of course, the result will be more influenced not by the price of the accessory, but by the photographer’s skills in using it. Start shooting with the flash you have available. Make sure the exposure is correct and adjust the flash power accordingly.

by Cesar Castillo
Nikon D3X camera
Nikon Micro Lens 105 mm f2.8
Focal length 105 mm
Shutter speed 1/95s
Aperture f/32
ISO 400
Many professional photographers advise using an aperture value of about f/22, f/32. The higher the number, the smaller the aperture, allowing for greater depth of field where more image detail is in focus while the flash creates enough light to freeze any movement.

by Sreekumar Mahadevan Pillai
Canon EOS 60D camera
Focal length 60 mm
Shutter speed 1/50s
Aperture f/10
ISO 1000
A regular off-camera or built-in flash produces more light than , but the light is more direct, which is not always the case. the best solution to highlight shadows. Don't worry if for some reason you can't afford a ring macro flash to do high quality photos, the equipment that is available may well be sufficient. Just proceed from your capabilities, planning photography for one or another period of the day, depending on the weather conditions and the presence of sun and clouds in the sky, in particular.

by bug eye
Canon 7D camera
Lens macro 100 mm
Focal length 100 mm
Shutter speed 1/160s
Aperture f/8
ISO 160
Well, if you want to equip yourself in the first category, it’s worth considering next steps to improve your photo macro arsenal.
Must-Have Lens for Macro Photography

by teguh santosa
Canon EOS 450D camera
Focal length 60 mm
Shutter speed 1/125s
Aperture f/9
ISO 400
A 50mm or macro lens is best. Choose the best option, which you can afford so that you can increase the size of an object from 1:1 to infinity.

All large manufacturers produce their own macro lenses.
The Flash That's Right for Macro Photography

The ring flash is shaped like a donut. It surrounds the lens and helps produce uniform, soft lighting. Some ring flash models have the ability to configure groups of flash lamps individually.
To avoid constructing complex designs of off-camera flashes, it is enough to spend money once to buy a ring flash, which is ideal for macro photography.

Macro rings speak for themselves

There are several ways to change the focal length of an existing lens. For example, you can increase the distance between the lens and the body using extension rings or additional lenses with a special close-up screw. Both solutions are cheaper than a macro lens, although not as convenient.
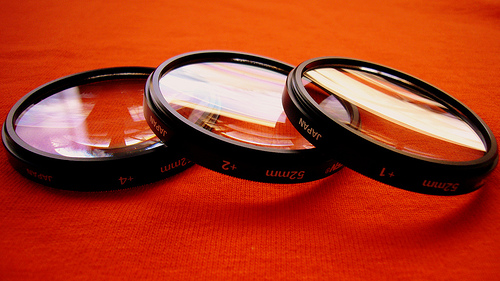
Additional lenses are ordinary magnifying glasses that are screwed onto the lens like a filter, available in different diopters: +1, +2, +3 and +4. Depending on this and the lens used, the image is magnified by a certain factor.
And finally, something worth always remembering: macro photography is the privilege of the patient and diligent. Use it like strong point of your character or to develop calmness and only calmness.
The world around us is amazingly diverse and colorful, rich in details and patterns. You just need to take a closer look at it. More often than not, photographers are passionate general types. In addition to event photography, among the genres, landscape and, less often, still life receive special attention. It has been noticed that if a landscape photograph contains a foreground with its inherent relief and texture, the effect of presence is enhanced. And in still life it is almost always necessary to emphasize the detail and texture of objects. But there is a special genre in which close attention to individual objects and their details is inevitable due to the short photographic distance. This genre is called macro photography.
The notable advantages of amateur digital cameras - digital cameras, of course, include the ability to shoot from a distance of several cm. Even entry-level amateur digital cameras can shoot from a minimum distance of 5 - 20 cm. A mode specially designed for this purpose - “macro”, allows you to photograph from such close range without the use of additional accessories. Advanced DSPs in macro mode allow you to shoot from distances up to 1 - 5 cm. Therefore, even beginners in photography can realize in practice the versatile advantages of macro photography. A photographer can capture fairly close-up small objects - flowers, insects, coins, see the texture of wood and stone, and “examine” micropatterns on an object that are barely noticeable to the naked eye. Overall, shooting very close is one of the most effective creative techniques. With a little experience and patience, you can get images that are diverse in subject matter and impressive in their unusualness. By carefully peering into the natural world from close range, you can capture unusual shots with increased detail and rich texture of your subjects.
About the scale of pictures when taking macro photography
To more accurately imagine what actually refers to macro photography, let’s turn to the concept of image scale. Scale is understood as the ratio of the linear size of the optical image of an object in the focal plane of the camera (i.e. on the film of a conventional camera or on a photosensitive digital matrix) to its real dimensions. This ratio is also called linear increase. It is generally accepted that macro photography is a type of shooting in which the scale of the resulting images on photographic material ranges from 1: 10 to 5: 1, as set out in the classic encyclopedia “Photokinetics” (edited by E.A. Iofis, 1981). Usually macro photography used in scientific photography - geology, biology, medicine, etc. But now it is becoming one of the popular genres of artistic photography.
Let us once again draw the reader’s attention to the fact that in a digital photocompressor, instead of a photographic film, the role of a photodetector is performed by a light-sensitive matrix, the dimensions of which determine the size of the frame. The size of the matrix in amateur DSCs is 3-5 times smaller than the frame size of a narrow film, equal to 24x36 mm. The linear dimensions of the matrices used in elementary-class, average amateur and semi-professional digital training centers are given in Table.
Table
|
Dimensions of the photosensitive area CFC matrices |
||
|
Size in inches |
Length, mm |
Width, mm |
The size of the photosensitive matrix of the medium and semi-professional class DFC with a built-in lens is, as a rule, 1/1.8 or 2/3 inches. In reality, this means that you can take a “full-length” photograph of small insects (bees, bugs, bumblebees). Others will be interested in photographing small household items, for example, jewelry, coins, badges, etc. On a smaller scale, you can photograph flowers, details of household items, or individual parts of the face.

The original scale of the optical image (on a photosensitive matrix) for a digital photoconductor does not exceed 1: 2.5 – 1: 5. Obviously, the scale of the image on the print increases by the magnification factor during printing. For a photosensitive matrix form factor of 1/1.8 inches (a common size for mid-class digital digital cameras), the matrix size along the long side is about 7.2 mm. Therefore, with a print size of 15 x 20, the magnification factor is approximately 28 times, and the image scale will be about 11:1 - 6:1. Those. It is possible to enlarge the subject up to 10 times on a print with a moderate format. This means that on the print we are viewing the object as if through a powerful magnifying glass. Improved detail compared to observation under normal conditions appears if the object is viewed even on a digital digital display monitor. When viewing images on a computer monitor, the magnification factor will be up to 50 times (depending on the size of the matrix and the size of the monitor).
Learn more about macro cameras
So, for especially close-up shooting, the digital camera with a built-in lens is functionally intended from the very beginning. To do this, just press a special button to activate the “macro” mode. This allows you to photograph small objects in close-up from a distance of several cm from the object without special equipment. Some cameras even have two sub-ranges for macro photography- “macro” and “super macro”. Super macro mode allows you to get even closer to your subject. However, most models are equipped with one macro mode. However, some of them allow you to photograph from a distance of up to 1-2 cm. But not very many digital camera models provide a minimum focusing distance (MDF) of up to 1 cm. These are, for example, the Nikon Coolpix 5400 digital camera, FujiFilm FinePix S602Z , FujiFilm FinePix S7000, Ricoh Caplio RR1, Ricoh Caplio RR30 and Ricoh Caplio G3.
A number of models from Nikon Olympus and Pentax allow you to photograph from a minimum distance of 2 cm. The minimum shooting distance for most digital camera models in macro mode is from 5 to 20 cm. It can be noted that for amateur-grade cameras MDF is mainly within 10 - 20 cm, for middle-class cameras - 5 -10 cm, and for semi-professional MDF cameras it is often less than 5 cm.
In fairness, one important and curious detail should be noted. It is not at all necessary that cameras with a lower MDF value provide a larger image scale. Linear image magnification depends on two parameters - the distance to the subject and the focal length of the lens. This dependence is linear in both cases, and the scale of the object increases both with increasing focal length and with decreasing shooting distance. So the linear magnification of the object can be even greater, although shooting is carried out from a greater distance, but with a long focal length lens. The fact is that the “macro” mode in digital cameras is usually available for a certain range of focal lengths of the built-in zoom lens. Most often, in many models, confident focusing in the “macro” mode is possible for the wide-angle position of the zoom lens, i.e. at minimum focal lengths. In this case, the macro mode icon turns green (or yellow). At other zoom ranges of the lens, autofocus will not work and the icon will be discolored. In some models, the macro mode is available in the middle zoom range. And in very rare models there is a macro mode with a wide zoom range up to the long-focal position of the zoom lens.
For example, for the Konica Minolta DiMAGE A200 model, the shooting scale in macro photography is maximum at the longest focal position of the lens – the equivalent value of 200 mm. The minimum focusing distance (MDF) in this case is 13 cm from the front surface of the lens. The maximum size of the shooting area is 52x39 mm. The size of the photosensitive area of the matrix of this camera along the long side is 8.8 mm, therefore, the image scale is almost 1:6. When shooting macro in the wide-angle position of the lens, the MDF is 21 cm from the front surface of the lens and the shooting scale is significantly smaller. Thus, this camera with 13 cm MDF is a pleasant surprise for lovers of macro photography. In passing, it should be noted that switching to macro mode for the DiMAGE A200 camera is performed using a mechanical switch located on the lens barrel.
Another notable feature of a digital camera worth mentioning is its large depth of field. When taking macro photography, not only the scale is significant, but also the depth of the sharply depicted space - the depth of field of the objects being photographed. The depth of field depends on both the distance to the subject and the focal length of the lens. The depth of field increases with increasing distance to the shooting scene, but decreases with increasing focal length of the lens. To an even greater extent, the depth of field also depends on the value of the set aperture. The larger the aperture value, the greater the depth of field in the image. It is known from the theory of optics that there is an inverse quadratic dependence of the depth of sharply imaged space on the focal length and a linear dependence on the distance to the subject. Thus, with an equal shooting scale b O Greater depth of field is provided by short focal length lenses. The focal length of digital camera lenses is several times smaller than that of film cameras. Therefore, the depth of the sharply depicted space at the same shooting scale will be several times greater. (For the convenience of users, the actual focal length of digital camera lenses is often reduced to the equivalent focal length for a narrow-film camera lens).

Accessories for Macro Photography
The most necessary accessory for macro photography of stationary objects is a stable tripod. After all, when doing macro photography, in all cases it is preferable to almost limit the lens aperture to ensure maximum depth of field in the imaged space. Increasing the shutter speed, which does not change when the lens is stopped down, can lead to blurred images when shooting handheld. Another important additional device is the remote control remote control. This attachment will also help eliminate possible camera vibration when pressing the shutter release. To reduce blurring in the absence of a remote control, it is useful to use the auto-recording mode. In this case, the shutter is released after 2 or 10 seconds. after pressing the shutter.
When photographing outdoors, any unusual butterfly or bug, a tripod is unlikely to help. In this case, when “prey” appears at an acceptable distance, the hunter must find a shooting point, take a stable position, choose the moment and hold his breath while pressing the shutter button. But the optical viewfinder should be used with allowance for the effects of parallax shift when shooting at close range. It is better to frame the plot using the display monitor.
As mentioned, optical lens attachments for macro photography are designed for some models of compact digital cameras. Light filters for macro photography with digital cameras are of limited use. A polarizing filter may be helpful. It allows you to soften or eliminate glare on glossy surfaces, and in some cases improves color rendition. Light filters are installed on the lens frame through a special attachment or directly onto the threaded mount of the lens frame.

Macro Lighting
A prerequisite for getting impressive photos is the right lighting. Through many years of practice, photographers have developed lighting schemes with various sets of flashes, diffusers and reflectors. In nature, natural sunlight is usually sufficient. For additional highlighting of shaded details, you can use a sheet of plain white paper. To reveal the texture of the objects being photographed, the most appropriate side lighting is directed at an acute angle to the surface of the subject being photographed. Therefore, morning or evening hours for shooting horizontal surfaces are preferable. This allows you to work out the texture of the subject well. But, in addition, it is advisable to make sure that the shadow from the camera does not fall on the object. Midday hours may be preferable when shooting vertical subjects. It must be taken into account that when shooting from a very close distance, problems with lighting may arise due to the shading of the object by the body of the device.
The scheme for constructing artificial lighting is similar. Highly directed side light contributes to good texture development. Reflectors can also help illuminate deep shadows. The use of a built-in flash is not always justified, as it usually leads to overexposure of the image and possible uneven illumination of the subject. You can, of course, set the flash to a reduced intensity mode, but even in this case it is advisable to install a diffuser in front of the flash. An example of such shooting, performed with a Nikon Coolpix 990 digital digital camera, is shown in Fig. 1.
For high quality macro photography Digital cameras have developed special flashes. Of course, cameras must have a hot shoe or sync contact. Thus, installed on digital cameras of the Nikon Coolpix series, the lightweight and compact MACRO COOL-LIGHT SL-1 flash allows you to macro photography without the use of complex lighting equipment. The SL-1 flash has 8 bright LEDs that illuminate your subject. For “digital SLRs” from Nikon for macro photography There is also a photoflash for shadowless illumination SB-29s with flexible and independent intensity control for both modules.
Similar flashes have been developed by other companies. For example, Canon for macro photography CFC has developed the MT-24EX dual flash and the MR-14EX ring flash. For TsFK from Konica Minolta are developed for macro photography dual Macro Twin Flash 1200 and Macro Ring Flash 2440.
You should also pay attention to the choice of background for the scene you are shooting. The subject should stand out well against the background, and the background itself should not be distracting. It is usually better to choose a uniform background of muted tones. White, gray and black backgrounds are also applicable. A gray background is the most neutral, while a black background enhances the perception of the color nuances of the subjects. Among color tones, the preferred colors are cool and dull. This creates the effect of bringing the subject closer. Warm and bright colors can create the illusion that the subject is further away from the background.
Camera as a scanner for macro photography
One of the successful directions can be called the use of CFC in the “ macro photography"as a kind of simple digital scanner. It is advisable to use TsFK for retaking pictures or text and for translating into digital view ordinary photographic prints. A useful activity is retaking negatives or slides to quickly create a home digital photo library. For this purpose, special attachments have been developed (also called slide scanners), which are placed on the lens frame through an adapter ring. With a matrix size of 1/1.8 inches, the shooting scale of a slide measuring 24x36 mm is approximately 1: 5. Some digital digital cameras have a special shooting mode for a negative image. This allows you to immediately convert the negative you shoot into a positive image. However, you can also use the capabilities of graphic editors for this purpose, for example, Adobe PhotoShop. This makes it possible to neutralize the influence of the masking layer of photographic film, which the author has verified practically.
Using the DSC in macro mode can also be useful for creating a family electronic retro archive. For example, for re-taking small photographs from various documents (identities of various organizations and societies, passes, etc.). After additional computer editing of old photographs, or rather their restoration, they are distributed into electronic folders. The convenience of using a digital film camera in scanner mode is obvious, because you don’t have to wait for all the film to be used up. Therefore, the archive can be periodically replenished with each new discovery.
Macro photography with digital SLRs
Finally, let's talk about macro photography with digital SLR cameras. Such cameras may also have a special “macro” shooting mode, but its effectiveness is questionable. The success of a business is determined by the same traditional methodology. macro photography, similar to the technique macro photography regular SLR cameras. There is a large amount of information about methods and devices for macro photography with film cameras, contained in numerous photographic literature. By analogy with digital SLRs, numerous accessories designed for macro photography can be used. These are positive attachment lenses that screw onto the lens; extension (intermediate) rings or attachments with stretch bellows, installed between the camera body and the lens; teleconverters, also installed between a conventional lens and a camera. Of course, special macro lenses (lenses designed for photographing objects at close range) can also be used.
The use of attachment lenses is justified only for macro photography with cameras with built-in lenses. It is advisable to use expensive branded teleconverters with long-focal lenses in the field for macro photography of relatively distant moving objects - butterflies, dragonflies, etc. High-quality special lenses for macro photography also not cheap. Depending on the focal length, they allow you to shoot quite close-ups from a minimum distance of a few cm to half a meter. For stationary shooting, it is easier and cheaper to use bellows or extension rings with conventional lenses. You can also use a wrap-around ring that allows you to turn the shooting lens around to the reverse side, i.e. the front surface towards the frame window. This allows you to increase the image scale several times and is technically the easiest to implement.

A little about macro photography techniques
I will describe below the methodology I use. macro photography SLR digital camera Nikon D70. I would like to note right away that it was possible to purchase special branded accessories designed for this purpose. But since there was a domestic attachment for macro photography PZF with a sliding bellows, intended for use with Zenit-type cameras, it was possible to use it successfully. Only an adapter ring was additionally purchased from the Nikon bayonet connection to the Zenit threaded connection. But this was still not enough to connect the D70 to the PZF console. The protrusion of the viewfinder was in the way. Therefore, ring No. 2 from a set of threaded extension rings for Zenit was attached to the adapter ring. Next, Nikon D70 with a set of adapter and extension rings was attached to the PZF attachment. On the other hand, a “Zenit” lens was installed on the console, but not directly, but through a special wrapping ring, to which the lens was attached through a threaded connection intended for light filters. It is necessary to explain to the reader that for macro photography You could also use a set of extension rings. But working with the sliding bellows attachment is more convenient, since the magnification can be changed smoothly, and it is convenient to place the objects being removed on the attachment frame. In this case, the size of the optical image is close to the natural size of the objects being photographed and larger. And for shooting at lower magnification, we simply used various extension rings from the kit. For macro photography on a scale of no more than 1:3 -1:5, you can only use a wrap-around ring, which allows you to turn a regular lens with the back side towards the subjects.
Used for macro photography I used two high-quality domestic lenses - the normal Industar-61L Z-MS 2.8/50 and the short-focus Mir-1 2.8/37, which received a grand prize at international exhibition in Brussels in 1958 (there was no second adapter ring from the threaded connection to the bayonet connection for the Nikon lens).
Since the optical system for the autofocus camera was not standard, shooting was performed only in manual mode "M" ( macro photography). In other modes (A, P, and automatic), the shutter did not fire and an error message appeared in the control panel. Exposure metering worked, but the exposure was automatically set incorrectly. The correct exposure was selected using the method of successive approximations. To do this, the shutter speed and aperture were set using years of personal photographic experience, and the test shot was analyzed using a histogram. Large and colored (orange) histogram on the monitor Nikon cameras The D70 made it easy to detect deviations from normal exposure. After some adjustment of the shutter speed or aperture, the exposure was optimized. The original shooting scale was set in the range 1.5:1 – 2:1. Focusing was performed by mechanically changing the distance between the subjects being photographed and the optical system.
For additional illumination with a strong aperture of the lens, I had to use a flash. Using the built-in flash was unsuccessful because the subject was heavily obscured. Therefore, I had to use an external flash. The branded SB-600 and SB-800 flashes recommended for the D70 were not available. As a result, an external Nikon SB-28 flash with a diffuser installed in a hot shoe was used. The remote distance of the illuminator from the axis of the optical system made it possible to uniformly illuminate the object being photographed. But still, in this case, in TTL mode the flash was inactive, and it only fired in mode “A”. But, apparently, due to the peculiarities of the optical design, the exposure also had to be adjusted.
It remains to note once again the fact that when macro photography SLR cameras showed the advantage of digital cameras over film cameras. When building sophisticated optical circuits with adapter and extension rings, the exposure metering system does not always work correctly. For film cameras, exposure compensation is usually entered using special tables that take into account the degree of linear magnification. But the result of the correction can only be determined after the film has been developed. Using a histogram in a digital SLR allows you to quickly optimize exposure.
The material presented in the article does not exhaust all the possibilities of macro photography with digital cameras. Nevertheless, the feasibility and usefulness of this shooting mode for amateur photographers is quite obvious. Take heart, lovers of photographic creativity.
— Sean, it seems like you cut off one frame from the last film. Please answer, could you, say, forget to send it to me?
—Are you talking about the very last photo?
- Yes.
— about the twenty-fifth?
- Yes…
- you are sitting on it.
2014 (C) “The Incredible Life of Walter Mitty.”
So I sat for a very long time, not noticing that there was an excellent lens under me! More precisely, not the lens itself, but, so to speak, the macro ring. We are talking about a chair, the repair of which I wrote about six months earlier. And again they used a mallet and a knife... I already had a lens, it seems from an overhead projector, but before that it was not clear how to attach it to the lens. The ideal option for the adapter turned out to be a casing from a gas lift chairlift! Moreover, one of the elbows fit perfectly over the lens, and the second was perfectly attached inside the thread made for the light filter. I chose the second option. All the work came down to cutting the ring to the required height (about 3.5 cm). The lens, wrapped in one layer of black electrical tape, fit tightly inside the ring. In general, everything is simple, and you don’t need to spend thousands on optics. The quality of the pictures is certainly not for glossy covers, but I think it’s better than buying a reversing ring, because... You cannot control the aperture with it. And when shooting, you have to close the aperture, and the more, the better. Some will say that the image has terrible distortion at the edges; on the other hand, distortion and chromatic aberration can be considered a peculiar effect. It’s like in music, someone struggles with distortion of sounds, and the owners of electric guitars, on the contrary, try to strengthen them. Pictures can be taken from a distance of 3-5 cm. To remove blur at the edges, you have to close the aperture completely. Therefore, the shutter speed increases, and you need to take photographs with a tripod, or in very bright lighting.
This is what the nozzle looks like from an uncut casing. Now with a camera you can safely go out into the street and scare away passers-by, however practical application there is no one for it because such a pipe blocks the entire view. As a result, in all the photos we get a bright light at the end of the tunnel...
And here is a already cut ring of the required width. The edges of the pipe can now only be detected at minimum zoom.
Working photo attachment in action
Macro photographs taken using the attachment:
The greatest distortions are noticeable when shooting geometrically correct objects.
Fans of macro photography can easily find so-called reversing rings on sale, which allow you to mount the lens on the camera with the reverse side. But despite the simplicity of the design, they ask for immodest money for this accessory... Why give your hard-earned money if the problem can be solved with a piece of ordinary wire? You won't see any difference in the pictures.
Unlike using a lens attachment, an inverted lens allows you to take a closer look at the objects you are photographing. This is what the laptop display looks like. I did not crop the frame, but rather reduced the image. Those. When viewed at full scale, the pixels will be absolutely gigantic!
Macro photography is taking close-up photographs of small objects at close range. Without a doubt, this is one of the most interesting and fascinating genres of modern photography. Macro photography at high magnifications makes it possible to show on a photograph or LCD screen not only visible, but also details or the structure of an object that are indistinguishable to the naked eye. This is interesting not only for photographers, but also for researchers, which is why macro photography is currently used in various fields of science. But macro photography requires appropriate equipment and devices. These include sliding bellows, which are worth talking about in more detail.
Features of using optics when shooting small objects
For macro photography, a digital SLR camera is usually used, which can provide excellent detail and high quality Images. A DSLR camera is versatile and can easily adapt to specific macro photography conditions. If everything is more or less clear with cameras that can be used to photograph objects at close range, then with optics suitable for macro photography, the situation is somewhat more complicated.
In this case, the scale of the photographic image depends on the relative extension of the lens, that is, on its extension in relation to the focal length. For example, if you want to get an image of an object equal to 1/10 of its natural size, then you need to extend the lens to 1/10 of the focal length. If you are shooting with a 50 mm lens, then the extension will be 5 mm. In most cases, conventional lens frames allow this.
But what if you want to get an image scale of 1:1? This means that you will need to extend the lens to the size of its focal length. Of course, it's not that simple. For example, when using a 100 mm lens, you will have to extend it 10 centimeters. In this regard, conventional lenses are unlikely to allow you to obtain an image scale larger than 1:4 or 1:5. Even though their optical characteristics make them quite suitable for macro photography. Therefore, photographers who are professionally involved in macro photography have to additionally purchase expensive macro lenses, which are free of this drawback due to the use of complex internal focusing.
Agree that if your passion for photography is not limited to close-up photography of small objects, and you often take photographs in other genres, then buying a special macro lens will simply be a waste. After all, it costs much more than other types of optics.
Macro lenses have a long focal length, which is not always required when shooting landscapes. IN portrait photography A macro lens will also not be in much demand, since conventional optics have a softer focus and produce a less contrasting image, which allows you to better convey the elasticity, tone and softness of the skin in photographs. In a word, a macro lens is not a universal optics, but a lens focused on performing narrow, specific tasks.
Macro photography gear
How can you replace an expensive macro lens if you decide to take up macro photography? It turns out that there are many accessories for SLR cameras that allow you to zoom in on images using regular lenses. The essence of these devices is to provide additional extension of the lens. They provide the photographer with the opportunity to focus on the smallest details and look deeper into the microworld. Moreover, with these devices you can also use macro lenses to further enlarge the image scale and capture truly unique details in photographs.

It must be said right away that the set of devices for turning a universal or portrait lens into a macro lens is quite wide, and each of these devices has both its pros and cons. And the choice of this or that equipment depends mainly on the specific shooting conditions, the required image quality and your financial capabilities. Additional extension can be achieved, in particular, through the use of extension rings. But their thickness, unfortunately, is fixed and small.
Another option is a wraparound or reversible ring. This ring is perhaps the most inexpensive device that adapts to the lens for macro photography. It is simply screwed on instead of a light filter, and then the lens is attached to the body with the reverse side. This is a fairly compact and economical solution that does not degrade image quality and does not affect the lens aperture. However, when using the reversing ring, there is no possibility of changing the macro scale at the request of the photographer. In addition, such a device limits the functionality of the camera - autofocus and built-in automation do not work.

Lens kits for macro photography are also sold. These lenses are often called macro filters because they simply screw onto the filter thread. By using two or more lenses, you can select the image scale you need, just like when using extension rings.

The advantage of macro lens sets is that you don't have to remove the lens. This is very convenient when shooting outdoors, when it is undesirable or there is no time to remove optics. What is important is that when using lenses, all the built-in automation of the lens and camera is fully operational. But, unfortunately, this device often leads to a deterioration in picture quality due to the occurrence of chromatic aberrations.
Extension or sliding bellows
One of the best devices aimed at providing the ability to use universal optics for macro photography are extension or extendable bellows. Furs can have a wide variety of designs, but they all look like a standard “accordion” made of a thick leather or fabric bag. Macro bellows are installed between the lens and the SLR camera, as a result of which the lens can extend to the desired distance and, thereby, focus on finer details.

The photographer can easily control this kind of “accordion” - the more you move it apart, the larger the scale of the photographed object in the image. Actually, the main advantage of using bellows is precisely that they allow you to steplessly and smoothly change the scale.
It should be noted that similar designs with stretched fur folded like an accordion have been used by photographers for a very long time, one might say at the dawn of photography. In particular, in 1840, a camera designed by Pierre-Armand Seguier was released, which had a leather device for focusing. The prototype for the creation of bellows for macro photography was the blacksmith's bellows and the musical accordion, which appeared at the beginning of the 19th century, shortly before the official birth of photography.
The design of sliding bellows turned out to be so successful and versatile that it began to be widely used by photographers in cameras of various formats. For many decades, furs have been included in the assortment of many companies involved in the production of equipment and accessories for photography. However, at the moment the range of such products is no longer so wide. Among the most well-known manufacturers, the German company Novoflex is currently producing sliding bellows for macro photography.
Using bellows for macro photography is quite convenient. The degree of magnification is changed by moving the bellows apart, and focusing is changed by longitudinal movement of the entire structure. Focusing is a certain difficulty for the photographer, but if you also use special micro-lifts on which you can carefully move the camera, then no difficulties arise.
In macro photography, the camera and lens are not connected in any way and exist in autonomous mode. You open the aperture on the lens completely, focus the camera, then close the aperture to the working value and take a picture. Modern bellows for macro photography also allow you to use the tilt and shift functions of the lens to prevent perspective distortion, which sometimes happens when shooting small objects.

In addition, bellows are capable of transmitting all electrical signals between the camera and the lens. Indeed, due to the fact that the bellows separate the lens from the camera, many important functions simply stop working. This leads to the need to perform all operations, as they say, in mechanical mode, or to purchase special devices that transmit electrical signals from the camera to the lens. But today furs are produced in which this problem is completely solved. True, such systems are developed only for use with specific camera models, for example, for the CanonEOS family of cameras.
The only drawback of bellows for macro photography is that the entire structure (camera - bellows - lens) turns out to be quite cumbersome, because, in addition to the bellows themselves, you have to use special adapter rings to attach the bellows to the camera. A set of focusing rails equipped with a microlift is also required. Due to such a cumbersome design, macro photography using bellows can hardly be carried out in “field” conditions. Rather, it is exclusively studio and laboratory equipment. You should also not forget that the more you move the bellows apart, that is, the larger the image scale, the more the aperture of the lens used decreases.
Despite these disadvantages, extendable or extendable bellows are excellent for macro photography. They provide the ability to resize the image exactly as the photographer wants. And at the same time they do not degrade the quality of the final image. If you do not want to purchase a separate lens for macro photography, then it makes sense to take a closer look at the more affordable sliding bellows, with which you can shoot small objects and objects with a universal or portrait lens that you already have.
Work and education