Often, when we come to a housewarming party, we think in stereotypes and give tea sets or dishes. But what if each of the guests comes with a set of cups or plates? We advise you to pay attention to such a wonderful gift as a cutting board, especially since you can paint it yourself. Or rather, not even paint, but burn your own drawing on it! The topic of drawings for burning on a cutting board is very popular today, we will talk about this.
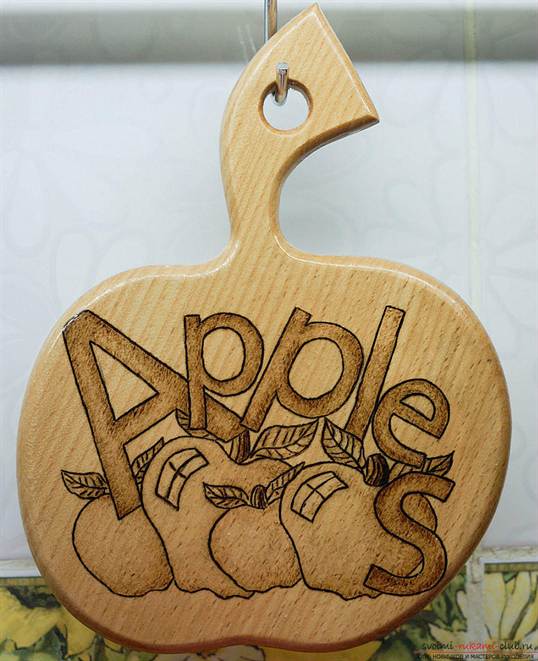
Even if you have no experience in pyrography or wood burning, it's okay, this lesson is available for everyone: both adults and children. There is absolutely nothing to be afraid of, because pyrography is not difficult, but very exciting. You can see an example in the photo.
Woodburning patterns are easy to find on the Internet, and there are many different templates and stencils for beginners. The main thing in this business is to be patient and have 1.5-2 hours left for a simple drawing.
What is needed

First of all you need pyrograph... This is such a special wood burner. You can buy it at craft stores. Also, the pyrograph is included in a special set for wood burning. This set includes a board (not a cutting board) and a ready-made stencil for burning.
It is very easy to buy a set; today they are common in almost all hobby hypermarkets and craft stores.
Also, of course, you will need cutting board... It is best to choose a light wood board. Linden or birch is perfect. The next thing that is needed is sandpaper... Acrylic or watercolors are also useful. paints, to decorate the board with color. Additionally you will need waxto wax after finishing painting the finished design. Waxing will add saturation to the image and retain the colors of both wood and paint for a long time. You will also need stencil and simple pencilto translate the drawing onto the tree.

Learning to translate

Many people ask the question “How to transfer a drawing to a board?”, And this is done using a stencil. It is necessary to find and download pictures of fruits, flowers or animals that interest you, as these are the most commonly used patterns for burning wood. It is best to choose simple templates, especially if you are pyrography for the first time.

We print the downloaded stencil and cut out the figure if the figure in the picture is empty. If there are additional internal parts, copy paper should be used. Place it on the tree, place the printed stencil on top and circle the drawing. Try to keep the image from shifting.

There is another way to transfer a picture to a board. You also need to print your favorite stencil, printed in mirror image. Prepare a bowl of water, decoupage glue, wood varnish, acrylic paints, a brush and a sponge.
Cut out the stencil or finished design, then carefully coat it with decoupage glue and attach it to the wooden surface, pattern down. Smooth out the pattern with a sponge so that it does not "bubble" and that there is no excess glue left. Let dry. It is best to leave the work to dry overnight.

Once dry, moisten the motif with a damp sponge and start rubbing off the paper until the design appears on the wood. Discard all paper carefully. Then, with our fingers, we begin to rub the remaining paper, making pellets that remain on the wooden surface. We brush them off the tree, and a finished drawing remains, which, after complete drying, can be supplemented with burning (for example, burn out its contours) or simply decorate with paints. Then cover the work with varnish.

Mastering the technique
After the drawing is outlined on the board, it's time to start burning. Make sure the board is completely dry. Then heat the burner to make the feather dark red.
Be careful when working with a hot pyrograph, it is very dangerous! It is better to do everything slower, but there will be no consequences.
Burning out is best done from the outline to the center. That is, first we outline all the outer edges and only then move on to the inner ones. It is best to burn out in separate areas: have worked on one, go to the next, but in another part of the picture. This will allow the drawing to cool down evenly and not create extra lines or stray strokes. When the work is completed, it can be decorated with paints. And then - treat with wax so that the board has a shine.
Let the owner of the house decide for himself whether to use your gift at home or hang it on the wall or put it on a shelf. In any case, your gift will find a worthy place in the kitchen and in the heart of your friend!


Cutting boards are an essential element of kitchen tools in any home. Plywood cutting boards, drawings of which can be seen below, in addition to helping in culinary activities, are an element of the kitchen interior, bringing a unique flavor to it.
The division of cutting boards into household and professional ones mainly concerns their appearance. For professional cutting boards, the material from which they are made is important. Therefore, boards made of special materials are used for each type of work. Household cutting boards have no special requirements, except for environmental friendliness, to the material. Their main advantage is the original appearance, with the help of which cutting boards in the kitchen, being in a conspicuous place, create a special interior.
Making a cutting board with your own hands is an opportunity to realize your creative potential and create notes of originality and uniqueness in the kitchen interior.

When starting to develop your own drawing of a cutting board, you need to think over options for how the cutting board will be held in the place allotted to it in the kitchen, whether there will be elements for easy grip in its design or there will be special gripping slots on it.

It is more reasonable to make cutting boards in the form of sets united by a single design idea. Such kits look more complete and will represent a separate decorative element in the interior of the kitchen. In addition, it will be possible to select a separate board for each food group, and their smells will not mix when cooking.

Plywood is an ideal material for embodying different ideas in the shape of a cutting board. Plywood comes in different varieties, but for making cutting boards, one with no knots on the surface is suitable. It is not recommended to use moisture resistant plywood due to its high content of various synthetic resins.
Cutting boards are in constant contact with water. The problem of plywood swelling when absorbing moisture is easily solved. One, non-working, side of the cutting board is varnished. This side of the board can be decorated with decorative painting or a scorched picture. The working surface of the board and its ends are soaked in hot olive oil or waxed.
To make cutting boards from plywood with your own hands, their drawings must first be drawn in the form of a sketch on paper. So it will be possible to compare various options for the embodiment of the idea and visually control the comparability of several sketches that will be included in one set of cutting boards. All these sketches need to be transferred to full-size cardboard and templates made. Such a template is also made for a structure that will hold a cutting board or a set of them in a suspended state. It can be a decorative shield, into which dowels will be inserted for hanging cutting boards, or it can be a more complex structure with a shelf on which the cutting boards will be placed.
Plywood Cutting Board Making Guide
In the process of making a cutting board you will need:
- A drill with a set of drills for wood;
- Manual or electric jigsaw;
- Grinder and a set of sandpaper of different grain sizes;
- Rasp;
- Manual milling machine.
Unlike wood cutting boards, decorative plywood carving is not done. When making cutting boards, originality of design is achieved through contour lines and decorative patterns on the board. Therefore, the shape of the cutting boards is of decisive importance when drawing up its sketch. From this it follows that the main tool that will most of all have to work in the manufacture of a cutting board from plywood will be a jigsaw.
Sawing should be done slowly, trying to make one continuous cut. In this case, processing the ends of the board will not be tedious. If there are internal isolated cavities in the cutting board sketch, then to cut them out, you need to drill a hole along the edge of the marking and, inserting a jigsaw file into it, cut out the desired segment.

At the end of the cut, the cutting board should be carefully sanded. The bulk of the work will be in finishing the ends. After working with the jigsaw, there are many chips left along the edge of the cut. The cut itself is not always smooth, especially in those places where one saw converged with another. Smooth end surfaces, to which the working surface of the grinder can be accessed, are processed using a power tool. Hard-to-reach places are leveled with a rasp or file, using sandpaper folded in half at the corners of the bend of the lines. Deep chips can disappear after processing the ends of the board with curly cutters. With the help of a milling machine, you can not only refine the ends of the cutting board, but also make an in-depth backing on the surface of the board or highlight the elements of the pattern that are a continuation of the contour line on the surface of the board, giving the pattern elements of three-dimensionality.
- Material selection
- Made from solid material: saw cut wood, wide board or plywood sheet
- Step 1: design
- Step 2: preparing the tools
- Step 3: processing the wood
- Step 4: details
- Step 5: protect
- How to make a board from fragments
- More ideas
The cutting board must be clean and sturdy. It can perform 2 functions: be a decorative accessory, serve as a cooking device.
The creation of a kitchen board is a creative process that does not have a clear algorithm.
What can be a cutting board
The technical composition must be free of toxic impurities.
The groups are fastened with clamps, aligned with slats in the upper and lower planes (see photo).
When the glue is dry, the group workpieces are sanded and planed to give evenness.

Dividing a large board into narrow pieces allows you to machine workpieces. Oriented to the width of the planing equipment working areas.
The processed group workpieces are leveled in thickness, glued, lubricating the side ends with glue, and fix the structure with clamps.

Step 5: trimming and final sanding
When the glue dries, the board is cut to the desired size, the surface is sanded again. The corners can be rounded off with a router.
A small groove is cut along the perimeter of the board. There will accumulate juice formed when cutting food.

Step 6: oil treatment
The finished product is treated with oil.

In a similar way, a board is made from fragments of any shape.


More ideas
For boards, you can use driftwood, unusual fragments of wood. Sometimes clear forms are avoided, they are dispensed with by grinding and impregnating the product with protective oil.

You can cut a hole in the finished board to remove scraps, grind the cut, attach legs to the board, and so on.

Care
Wood boards absorb odors and accumulate bacteria. To prevent this from happening, you should polish, soak the product with oil at least 3 times a year. The service life of the board will increase.
Calculators

